Halls of Torment 101:
The Complete Beginner's Guide

Introduction
There are a lot of mechanics in Halls of Torment. And if you’re new to the game, learning and mastering all of them can be a tough task. That’s where the Halls of Torment 101 guide comes in.
This guide is designed to help introduce players to the characters and mechanics of the game, as well as provide tips and tricks to help you progress. Whether it’s a primer on abilities, or information on the stats in your character sheet, you’re sure to find something useful.
Be warned, this guide does contain some mild spoilers for Halls of Torment character unlocks and quests. But if you don’t mind, bookmark this page, and let’s get started.
What is Halls of Torment?
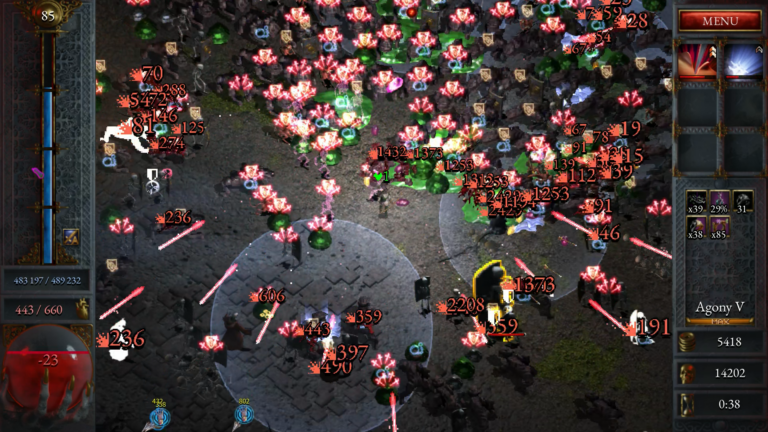
Halls of Torment is a Survivors style, roguelite action game, blended with the retro look of the original Diablo. You select a hero, delve into one of the many halls, fight through hordes of enemies, and survive until the boss spawns. However, this game provides some interesting twists on the formula, that make it stand out more than others in the genre.
As expected, the gameplay starts out slowly, but quickly ramps up in terms of difficulty, speed, and mechanics. The game itself perfectly encapsulates that ‘one more run’ feeling, and once you get rolling it’s hard to stop. It always feels like you’re unlocking something, or making some kind of progress.
If you like the genre, Halls of Torment is definitely worth a look. They have a demo available up on Steam.
Heroes
Halls of Torment has an insane number of heroes. There are currently 11 in the game, though only one is initially available. And the best thing about them, is that they all play differently. Since no two characters are similar, players are forced to experiment with new abilities and items.
Let’s take a brief look at all the characters, and their playstyles. They are listed roughly in the order you unlock them:
Swordsman
Starts out unlocked. Uses a giant Zweihänder to deal heavy damage in an area. All around good hero with no major weaknesses.
Archer
Ranged hero that deals tons of damage with a bow. Uses critical hits and multiple arrows to shred through enemies.
Exterminator
Uses a Flamecaster that shoots out a constant stream of fire that deals damage and sets enemies ablaze.
Cleric
A somewhat complicated hero that splits damage evenly amongst all enemies in range. He takes some getting used to, and in the beginning you’ll depend on supplementary Abilities.
Warlock
A summoner who deals damage with Specters that roam the battlefield. They have some tricky traits that allow them to manipulate their max health.
Sorceress
Deals steady magic damage thanks to her chain lightning attack. She clears areas very well since the lightning arcs to many enemies, but sort of struggles against single targets.
Shield Maiden
Attacks very slowly using both a Warhammer and Shield bash. Scales incredibly well with defensive stats, and can become pretty much a steel wall.
Beast Huntress
Primary damage source is her spear, but also has a trusty hound that roams the battlefield. She has a unique way of gaining one-time permanent stat bonuses.
Norseman
Has an insane attack speed with his dual axes. Triggers a Frost Nova AoE after a certain number of attacks.
Landsknecht
Deals physical damage with her long range Arquebus, and magical damage with her Grenade AoE. Her primary gun is a bit unforgiving to aim with.
Sage
A complicated hero, who’s main attack depends on the first ability you select. The Sage is without a doubt the hardest hero to use, and win with.
Bard
A hero who has their own custom abilities, that allows him to be built to fit a variety of archetypes. He also has his own special music tracks so you can rock out!
Crone
A heroine who focuses on summoning a variety of plants to keep her enemies at bay. Each type of plant has a different attack pattern and purpose.
Alchemist
A hero who uses different elemental potions, depending on which traits you’ve selected. Can combine multiple elements into a single flask toss.
Taking a look at this table, you can see this is a good amount of characters to play, each of them unique. Even when you level up, the same trait upgrade can impact a hero differently based on their trait affinities. We’ll get to traits a bit later in the guide.
As previously mentioned you start out with only the Swordsman, but will soon find many more joining your camp. You unlock these heroes by completing quests, which we will also get to later in the guide. They are usually pretty straightforward and don’t require too much effort to complete. The exception being the Sage, which can be pretty tough to unlock.
Par for the course in games like these, selecting a character is just one part of your gameplay experience. Another important thing to consider as you’re planning your build or prepping for your next run, is what Abilities you will to use.
Abilities
Abilities are special spells or attacks, that give players an additional way to deal damage. They have some pretty fantastic effects.
Just as there are many heroes in Halls of Torment, there are also MANY Abilities to choose from. There are 18 Abilities currently in the game, though you start with just four unlocked. You can unlock more by (you guessed it) completing quests.
You start the run with no Abilities equipped. In order to get your first Ability, you’ll have to find a Tome or Scroll of Mastery. The Scrolls will be highlighted in your in-game HUD, so you’ll know exactly where they are. Additionally, they can drop from elites. As you progress in the game, you’ll unlock the Tome of Mastery. This let’s you select any unlocked Ability immediately when you spawn in a level.
Here is a list of all the Abilities available, as well as which heroes they work best with. While there are 18 in the game, you can only equip six per run.
Arcane Rift

Arcane Rift causes magical portals to open up under the ground around your character. They stay active for a few seconds. You can trigger a rift explosion by walking over the ground, causing decent damage in the area. It’s a strong Ability, but tough to use. I’ve found that the Wandering Rift upgrade makes this significantly easier to use.
Best Heroes: Heroes that deal magic damage (Cleric, Warlock), Heroes that can get into close range can work well too (Shield Maiden, Swordsman).
Arcane Splinters

Arcane Splinters causes shurikens to shoot out in two opposite directions from your character. They stay in the field for a moment, damaging everyone before they disappear. Even though the damage is low, since it fires so many projectiles and they stay active for some time, it’s great for softening enemies.
Best Heroes: There are no real bad candidates for this upgrade, nearly everyone can make use of it. If you are using a Status Effect build, you can probably skip it.
Astronomer's Orbs

Astronomer’s Orbs causes several small orbs to orbit around your character, dealing damage to anyone who contacts them. Provides a nice safe area around your character that softens enemies. This is probably going to be your first go-to Ability. It’s available from the get go and is all around useful.
Best Heroes: This is another ability that is good for practically every hero. Special mention goes to the Warlock. The orbs count as summons and he gets a a few traits that enhances summons.
Clay Golem

Clay Golem summons a golem ally who fights alongside you. The golem attacks by slamming his fist or rolling around the battlefield.
Best Heroes: The Warlock can make excellent use of the Golem. It counts as a summon and the roll attack scales with Force, which the Warlock wants to build. But all classes can use the Golem fairly well.
Dragon's Breath

Dragon’s Breath shoots a wave of flame every few seconds in whatever direction you’re facing. It scales well with Area upgrades, and has a good chance of inflicting the Burn status.
Best Heroes: Of course, the Exterminator works well with Dragon’s Breath. In fact, they can virtually take all the Fire abilities and make them phenomenal. Fire builds will also love this ability. And if you’re playing a status build Norseman, you can use Dragon’s Breath to keep burn stacks on enemies.
Flame Strike

Flame Strike hits a single target with a strong fire attack. It doesn’t have the highest chance to burn, but does even more raw damage based on time between attacks.
Best Heroes: Unsurprisingly, this ability works well with the Exterminator, just not as well as Dragon’s Breath. Fire builds using this ability will want to take the Scattered Sparks upgrade to trigger massive explosions.
Frost Avalanche

Frost Avalanche shoots four slow moving frost projectiles, that crawl along the ground. Doesn’t deal a lot of damage, but stacks up the frost status pretty well.
Best Heroes: Good ability for the Norseman that compliments his frost nova. If you’re going for a Frost build, this ability does a good job at stacking the Frost effect. The Sorceress and other lightning builds can take this ability and use the Static Ice upgrade.
Hailstorm

Hailstorm conjures large ice chunks that grow in size while you’re moving around. When you stop moving, they fall to the ground and damage enemies below them.
Best Heroes: I have to admit, I have a tough time effectively using this ability. It’s really fun when it works, but it requires you stop moving which can sometimes be dangerous. It does have three great ability upgrades, so it is worth taking and experimenting with. Frost builds can make use of this ability just fine.
Kugelblitz

Kugelblitz shoots a ball of electricity that moves very slowly in an enemy’s direction. It will emit shockwaves every few seconds until it disappears.
Best Heroes: The Sorceress has incredible lightning synergy. It’s satisfying to see Kugelblitz pulsing through a wave of enemies, while also having her chain lightning arc through. Anyone can make use of Kugelblitz, but I find that it fits better with more melee (Swordsman, Shield Maiden) or Single Target (Beast Huntress, Landsknecht) characters.
Lightning Strikes

Lightning Strikes will hit random enemies for big damage and stun other nearby enemies. It’s quite strong, even though you can’t really control it.
Best Heroes: Once again, the Sorceress works incredibly well with lightning abilities. Though since the strikes hit randomly, just about anyone can make use of this ability. Heroes that increase the Area stat (like the Swordsman) can improve the effectiveness of this ability.
Meteor Strike

Meteor Strike shoots three meteors in a random direction. They explode when they hit the ground, dealing damage to any enemies nearby.
Best Heroes: Now that we’re back to fire abilities, it’s time for the Exterminator to shine. Since the meteors count as projectiles, the Landsknecht can get some good mileage out of this ability. Additionally, once again heroes that boost Area can also make this ability much better.
Morning Star

Morning Star causes your character to swing a giant iron ball in a pattern around them. This ability is interesting because it gets improvements from a lot of different stats.
Best Heroes: Since Morning Star swings around your character, melee heroes can get good mileage from this ability. Heroes like the Swordsman and Shield Maiden are prime candidates. You can get good use with the Norseman, but he is probably better with elemental abilities. And since the Morning Stars count as projectiles, even the Landsknecht can use them to great effect.
Phantom Needles

Phantom Needles shoots a near constant stream of needles at nearby random enemies. They don’t do much in the way of damage, but since they fire so often it really stacks up.
Best Heroes: The needles count as projectiles, so naturally ranged characters are prime candidates for this ability. The Archer in particular can make good use of Phantom Needles. The Landsknecht can also use Phantom Needles to make up for her slow attack speed.
Radiant Aura

Radiant Aura casts a bright light that deals a large amount of damage, split evenly amongst all enemies in range. With certain upgrades it can also stack debuffs and afflictions.
Best Heroes: Without a doubt this ability was made with the Cleric in mind. It just fits his playstyle so perfectly. It does magic damage, so any of the previously mentioned magic heroes work well. It’s also fun to use this ability and line it up with Arcane Orbs.
Ring Blades

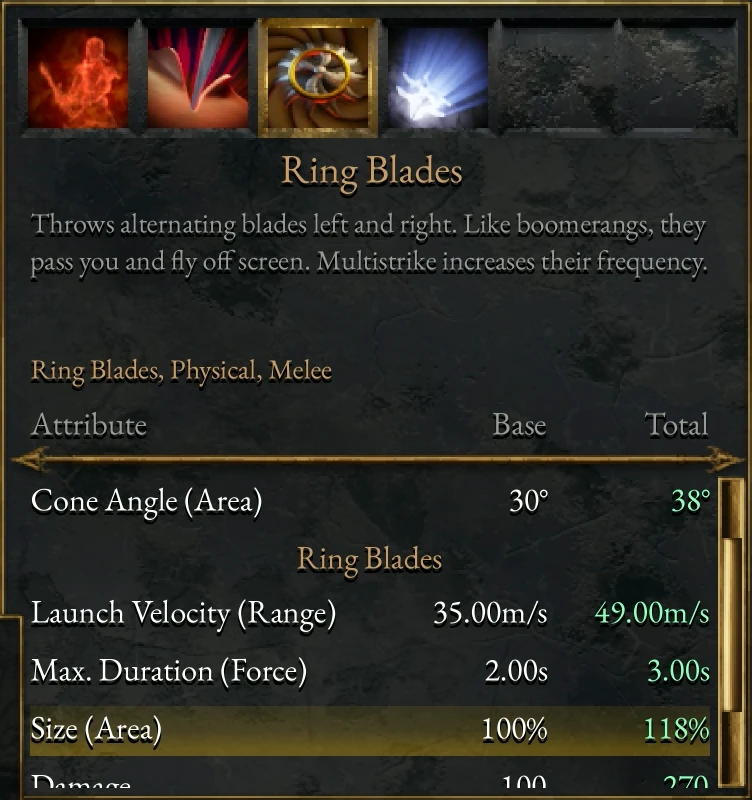
Ring Blades fires circular blades out from your character that boomerang and continue in the opposite direction. It’s a strong ability that can deal a lot of damage and cover a ton of ground.
Best Heroes: Ring Blades can fit in a ton of builds, as it has so much to offer. When I play the Sage, Ring Blades is often my go to first ability. It’s classified as melee and does physical damage, but honestly everyone can use it.
Spectral Fists

Spectral Fists summons giant magical fists that punch and knockback your opponents. The fists attack in whatever direction you’re facing. Since it isn’t affected by Attack Speed or Multistrike, you have to relay on trait bonuses and ability upgrades more than other Abilities.
Best Heroes: As usual with summon type abilities, the Warlock can really boost this ability up. Additionally, it deals magic damage and has a push back, so it pairs pretty well with the Cleric.
Spirit Warrior

Spirit Warrior summons a ghostly warrior that fights by your side. The Warrior will fight in an area, and dash towards you if you get out of range.
Best Heroes: Naturally, the Warlock can make this ability work wonderfully. It can be difficult to use effectively, since the warriors like to stand in one place and you usually like to be on the move. Plus their dash isn’t the easiest to control. With that being said, melee characters can probably make this ability work better than most range.
Transfixion

Transfixion fires a volley of projectiles in the direction you’re facing. They pierce through enemies, dealing damage and have a chance to apply Fragile.
Best Heroes: This ability is another great candidate for the Sage starting ability. It fires and applies the debuff often enough to help with initial survivability. It also fits the Archer and Beast Huntress playstyles to a ‘T’.
Just like our heroes, Abilities can also receive trait bonuses when you level up. You can improve the effects, damage, and duration, making them overall better. Though be warned that there are some Ability traits that come with a bonus in one stat, and a decrease in another. These are usually large stat increases, or increases to rarer stats.
Abilities can further be improved through upgrades. Although that sounds similar to a trait increase, it is dramatically different. A trait increase will boost a stat. An upgrade will dramatically change how the ability functions, making it a sort of evolved form of the base Ability.
Ability upgrades can be unlocked by once again completing quests. Usually, you can only apply two such upgrades in a run.
Another important aspect of Abilities is that, just like heroes, they are impacted by your stats. While it may not be 100% necessary, you can find better success by making sure your stat focus also buffs your Ability selection. Let’s take a closer look at the stats in Halls of Torment.
Stats
Halls of Torment has one of the most engaging and interactive stat systems that I’ve seen in games like this. There are so many different stats in Halls of Torment, and they impact everything. Your characters get boosts from stats. Your abilities get boosts from stats. Even your items and equipment get boosts from stats.
As you level up in a run you’ll constantly be upgrading these values, making your character stronger. It’s honestly impressive and fun trying to find ways to maximize your damage output by upgrading the proper stats. But naturally with a game with so many different stats to upgrade, there are some that are not straightforward to understand.
Let’s take a quick moment to look at some of the more confusing stats in the game.
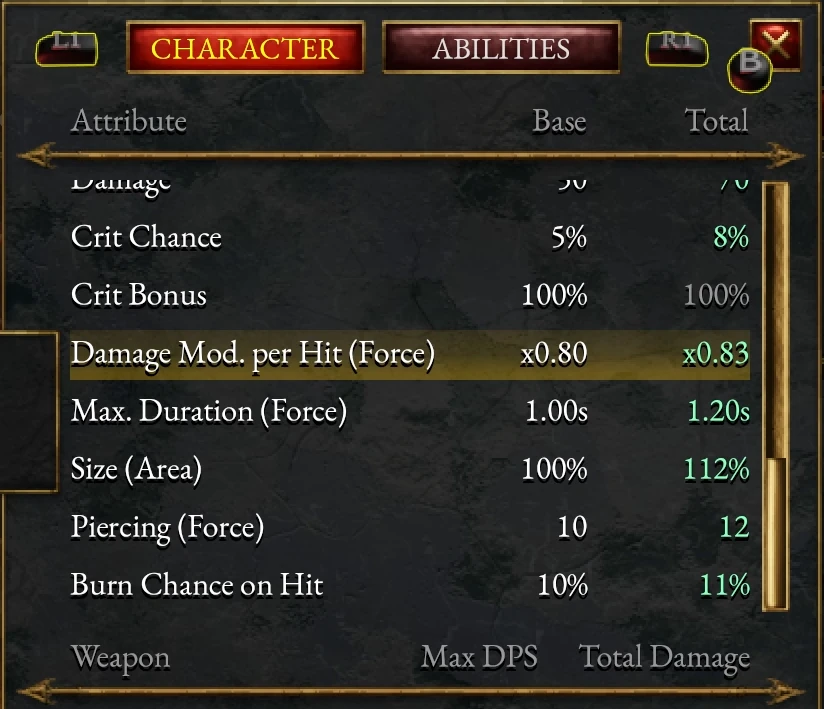
Force
Force is by far the most confusing stat in the game. It isn’t made clear anywhere what it does. Even the in-game tooltip advises you to check the abilities or skills to see what it affects.
To put it simply, Force helps you do what you do but better. It usually increases the duration of abilities, the piercing, or sometimes the damage. The truth is that Force is one of the most important stats and affects so many things. Make sure you look at your abilities and character sheets to see what areas Force will improve.
Block vs Defense
These are two stats that have a heavy impact on your survivability. And while they sound similar on paper, in reality Block Strength and Defense work in two completely different ways.
Block Strength will straight up negate damage if it’s below a certain threshold. That threshold increases as your Block Strength increases.
Defense will always reduce damage taken by a certain percent. This reduction increases as your defense increases.
Piercing
The piercing stat determines how many enemies a projectile will pierce though. This is a useful stat to boost since it makes your attack and projectiles last longer by hitting more enemies.
Multistrike
The Multistrike stat determines how many projectiles are fired off in one attack. Sometimes on your character sheet you’ll see a number that ends in a decimal here. When that happens, that extra part carries over to the following attacks, until it reaches a whole number.
Status Effects
Like most action RPGs, Halls of Torment also has status effects that you can inflict or be inflicted with. Use them to hamper your enemies, or set yourself up to do massive amounts of damage.
There are a ton of builds that make excellent use of status effects. And if you recall from the character and ability descriptions, certain characters and abilities are better at utilizing them than others.
Status effects can be broken up into two types: debuffs and elemental effects.
Debuffs
Debuffs are your typical status effects that are common in RPGs. They hamper or reduce the enemies stats in some manner. Currently in Halls of Torment, there are 3 debuffs: Affliction, Fragile, and Slow.
Elemental Effects
Elemental effects are special effects that build up stacks on a target. Enemies either take damage over time based on those stacks, or release the stacks as damage. There are currently three elemental effects: Burn, Frost, and Spark.
Achievements and Quests
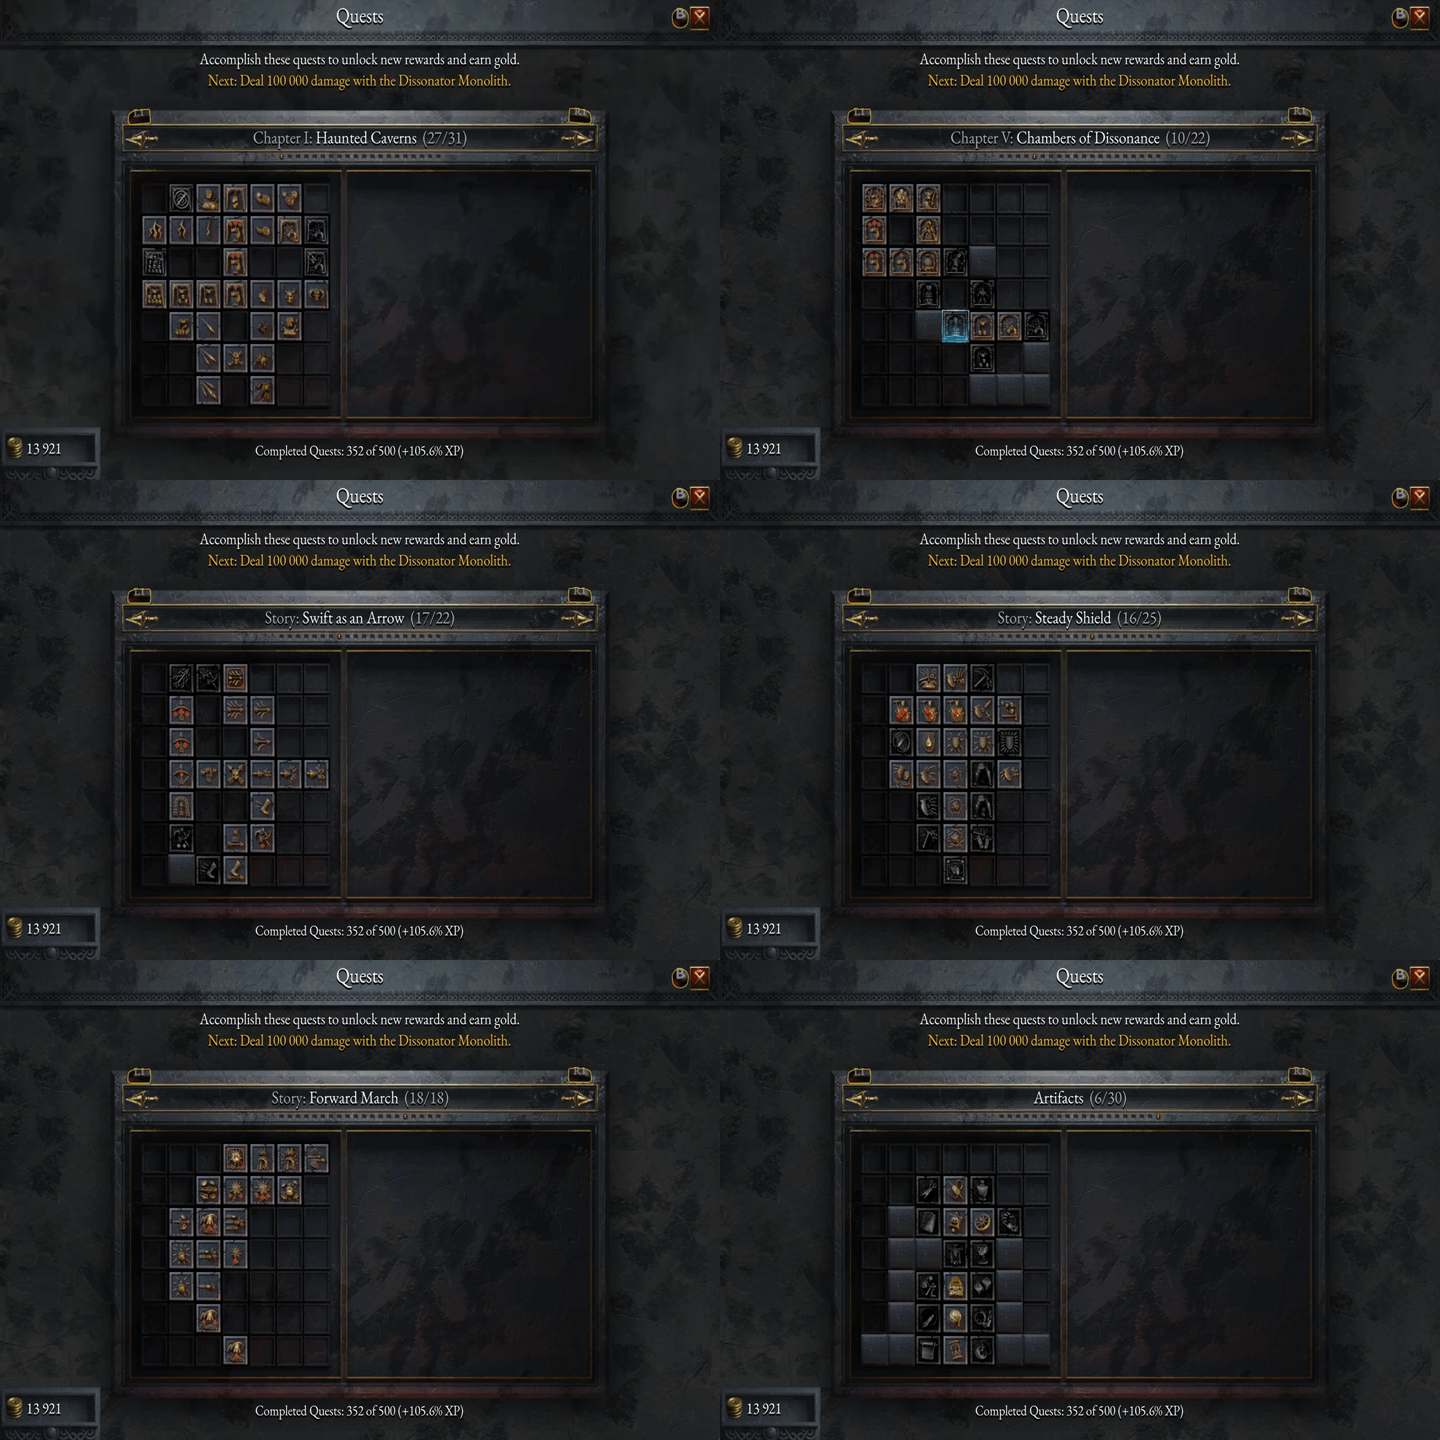
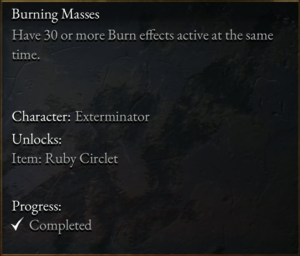
Now we get to one of my favorite features of Halls of Torment, and that’s the quest system. Quests are simultaneously your walkthrough, your primary source of powerups, and fun challenges to complete. The video on the left showcases how many there are.
The quest mechanic is incredibly deep and rewarding to work through. There are 500 challenges in the game and they usually offer worthwhile rewards. Completing quests will also give your account a permanent EXP boost. Additionally, completing them will get you new characters, abilities, traits, upgrades, you name it.
Naturally, there are some quests in Halls of Torment that are extremely difficult. You’ll need to wait until you’re more powerful to complete them, or devise a solid strategy before making an attempt.
The game also does a great job of guiding you towards which quests to complete. If you ever get lost, or are stuck, or just don’t know what to do in general, complete whatever the highlighted quest is. That usually unlocks a very important upgrade, character, or gameplay mechanic.
Traits
Speaking of upgrades, traits are the primary upgrade mechanic that you as a player will interact with in Halls of Torment. As such, understanding the details of the trait system will help you improve your gameplay and builds dramatically.
When you defeat enemies in the halls, they will drop EXP gems. If you collect enough, you’ll level up and be offered a choice of four traits to select.
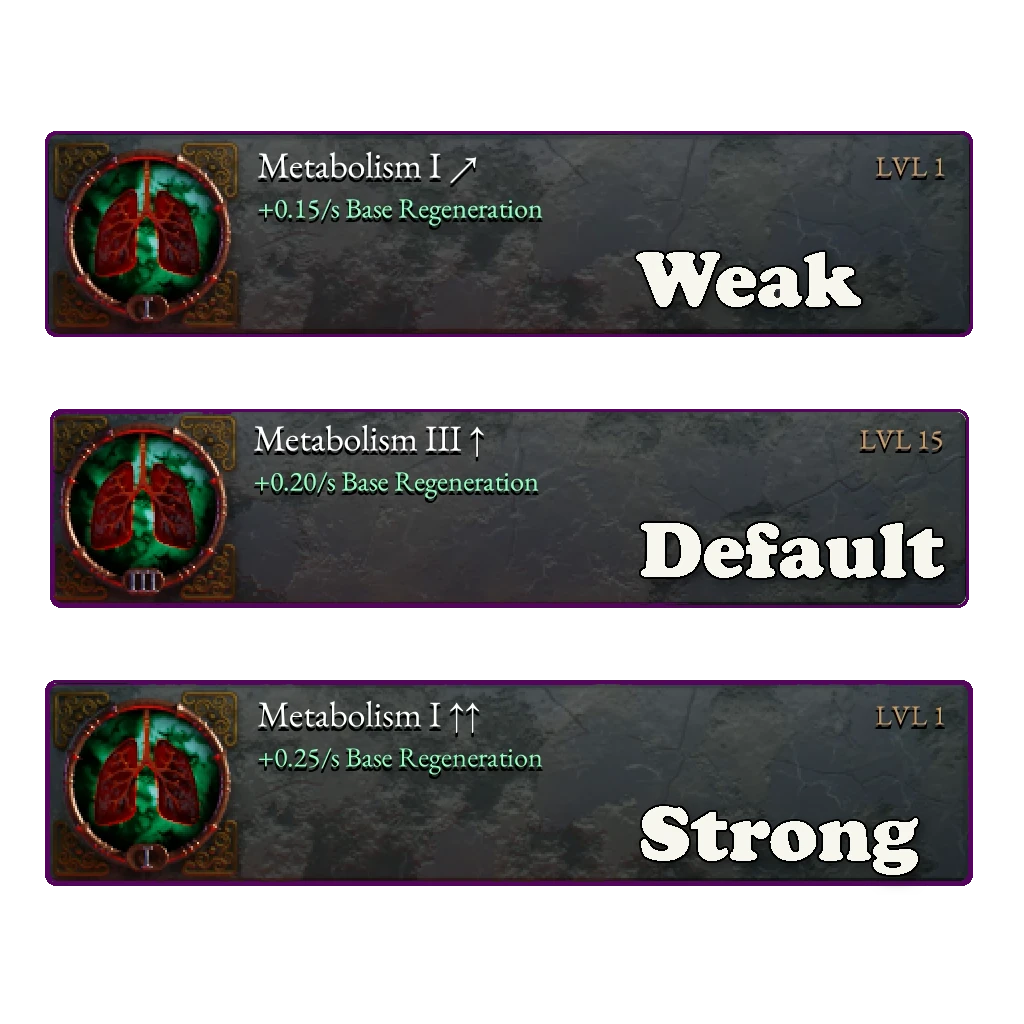
These traits improve various aspects of your character stats, but most specifically base stats and abilities. At first you’ll only really be able to improve your base stats. Depending on your character, the base stat upgrades can be stronger or weaker than average. You can see this difference based on an arrow indicator on the trait.
As you complete more quests, you’ll unlock more traits to select from. These unlocks can be significantly more powerful than the base upgrades, so unlocking them is paramount for progression.
Camp NPCs
When you first start up Halls of Torment, your camp will be practically empty. The only thing you can really do is check your quest log and start a run. As you complete quests though, you’ll soon find your camp full of helpful NPCs and resources.
You’ll unlock access to a variety of ways to improve your runs and gameplay experience. Whether it’s in permanent stat bonuses, the ability to keep equipment you find, or ways to alter your level up trait selections, it is worth it to complete the quests that fill out your camp.
When you’ve finished, you’ll have unlocked the Shrine of Blessings (which we will get to later) and the camp NPCs.
The three NPCs you unlock early in your Halls of Torment career are the Wellkeeper, Cupbearer, and Scriptor. Each one of these are important, and unlock a gameplay mechanic that you’ll want to take advantage of.
Wellkeeper
The Wellkeeper gives you the ability to keep equipment you find during runs. You’ll send them up the well, and then pay him a fee to add them to your stash.
Cupbearer
The Cupbearer allows the use of potions to change traits and ability selections. You’ll have to find herbs to unlock all the potions for use.
Scriptor
The Scriptor unlocks the Scriptorium, which lets you to inspect an item encyclopedia. He also grants the ability to spend Torment Shards on character upgrades.
Shrine of Blessings
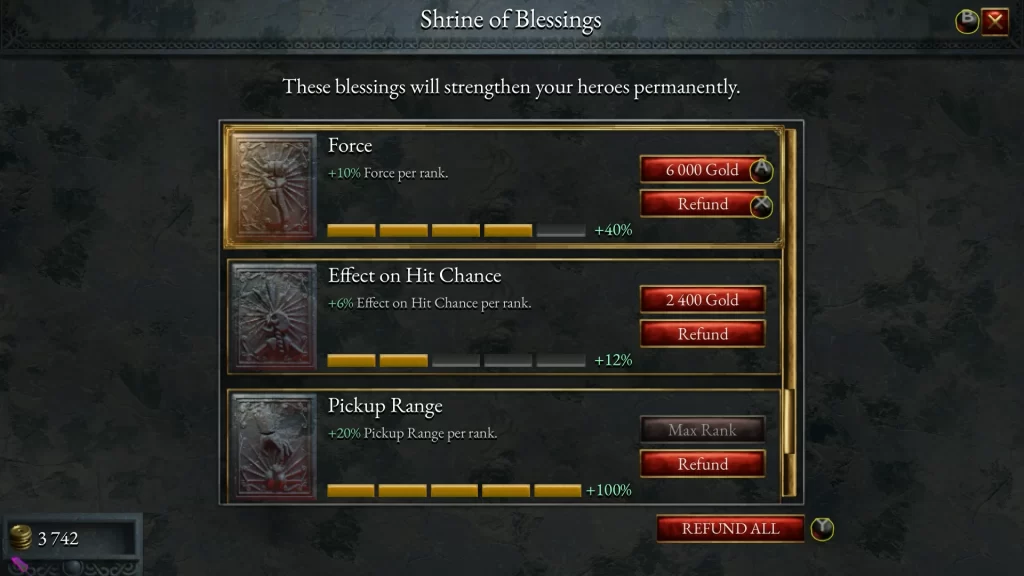
The other major camp resource in Halls of Torment, is the Shrine of Blessings. Here, you’ll spend your hard earned gold on permanent character stat upgrades.
The upgrades can be health, damage, attack area, revives, and anything in between. This is basically a gold sink, but with worthwhile rewards.
Feel free to pick and upgrade whatever stats you want. If you ever feel like you made a mistake you can always reset at no cost, so there is no risk at all.
Potions
Potions allow you to manipulate various aspects of your run. Once you have them all, you’ll be able to altar the traits you get when you level up, the abilities from scrolls and tomes, and the items you get from defeating a boss.
While this mainly takes the form of rerolling and banishing, there are some more interesting interactions as well. Such as the ability to select the same trait twice, or locking a trait to select later.
In all honesty, you won’t really make a lot of use of these in the beginning. But that’s mainly because your selection pool will be limited. Once you start unlocking more abilities and traits in Halls of Torment, these potions will become indispensible.
Herbs
When you unlock the Cupbearer you’ll have a few potions unlocked by default. In order to unlock the rest you’ll have to find herbs.
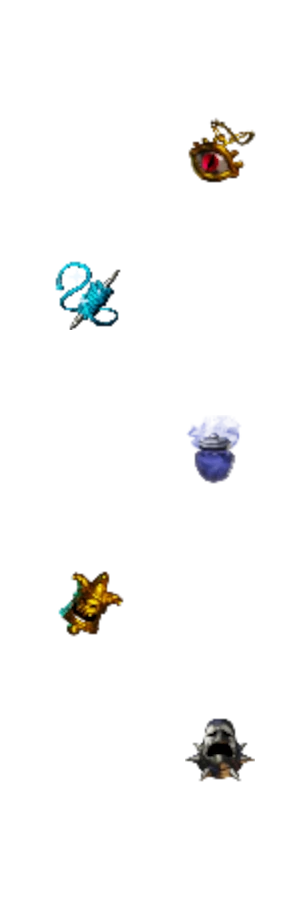
Each level will have at least one herb for you to find. Equip the Gatherer’s Charm amulet, and head into the levels to retrieve them.
Bottles
When you first unlock a potion, you’ll only be able to use it a few times. In order to use it more, you’ll need to find bottles.
You can find bottles by defeating elite enemies. Instead of dropping gear and equipment, they will sometimes drop a bottle for a specific potion.

Equipment
Equipment plays a major role in Halls of Torment. It can complement or alter your gameplay, and is the primary component of character builds.
You start the game with a basic set, but after you unlock the Wellkeeper you can farm equipment to keep and add to your stash. Defeat bosses to have equipment drop. You can use it immediately, or add it to your inventory. Send equipment up via the well in order to purchase it to keep.
By completing quests, you can unlock more equipment to the boss loot pool. If you find yourself stuck and unable to press forward, look to see if you have any new equipment that you can unlock through quests. They just may provide the power boost you need.
I cannot overstate just how much fun it is to play and experiment with item builds in this game. If you get the pieces of a fire build going, you end up proccing a ton of explosions when you hit burning enemies. Or start up an electric build, and cause chain lightning to spread throughout your enemies.
There are some truly outrageous effects out there, so make sure you try them all out.

Halls
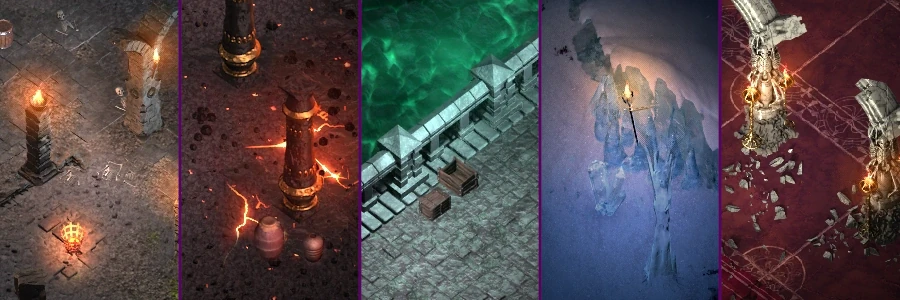
Halls are the titular levels in Halls of Torment. There are five standard halls in the game. You can unlock the next hall by completing the quest associated with beating the previous hall.
You start with the Haunted Caverns unlocked by default. Test yourself in a cavernous dungeon, full of skeletal enemies.
Survive the burning Ember Grounds against imps and hellhounds. Keep moving and avoid lava floors.
Withstand the ghostly apparitions of the Forgotten Viaduct. Beware of the Ghost Wall that threatens to box you in.
Traverse the frigid wasteland of the Frozen Depths. Watch out for traps that slow your progress.
And finally, navigate the winding maze of the Chambers of Dissonance. Make sure you don’t end up trapped with your back against the walls.
But wait! There is a hidden sixth hall unlocked via a special quest. Hover over the tile to the left for a sneak peek.
Bosses
Bosses, are powerful enemies in Halls of Torment. They spawn at the end of the run, and you must defeat them in order to clear the hall.
The bosses all have the moniker, Lord of ‘X’ (Lord of Pain, Lord of Regret, etc.), and there is a quest associated with beating each one. They also drop a Torment Shard upon defeat, which you can redeem for upgrades at the Scriptorium.
They have strong, chaotic abilities, and sometimes irregular attack patterns. You need to make sure you’re prepared to fight bosses at the end of the run, or face frustration at being defeated so close to the finish line.
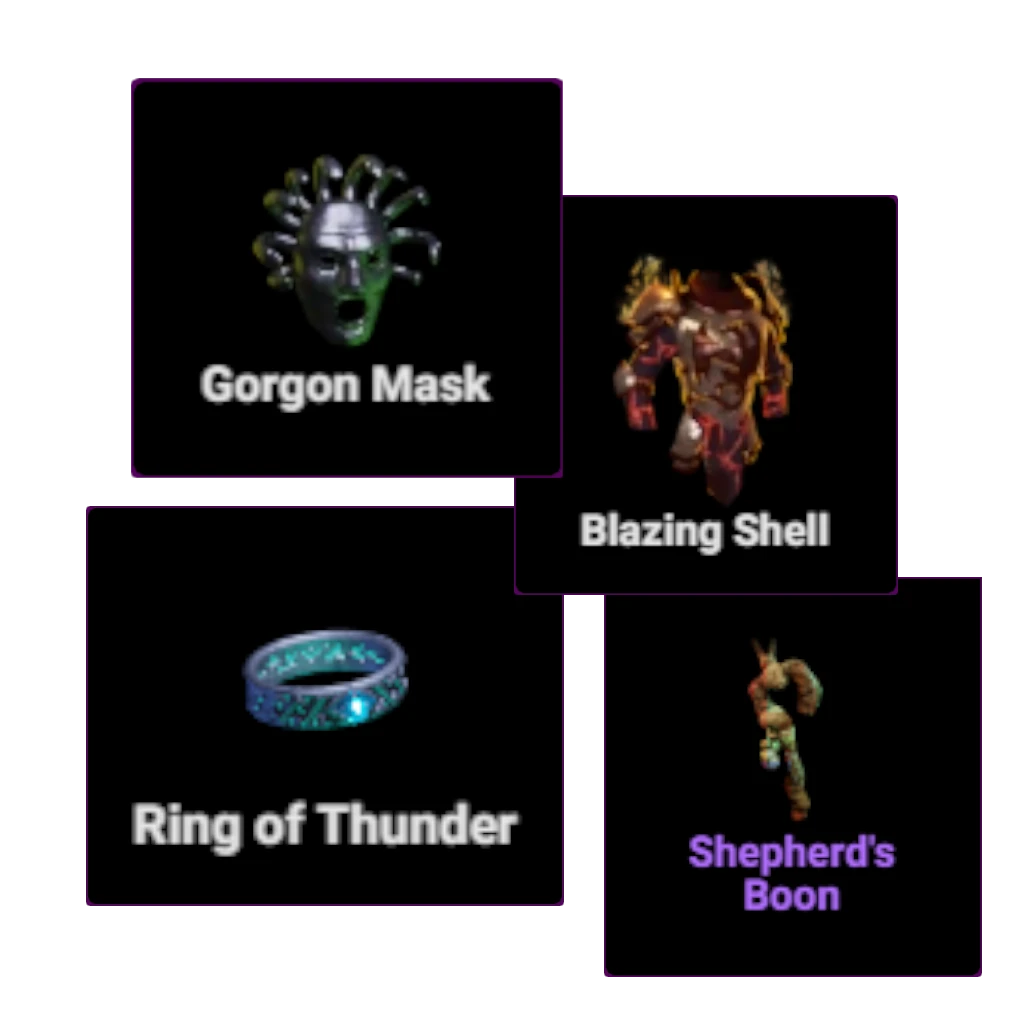
Luckily, each hall has a hidden item that makes their boss fight a breeze.
Secrets
Each level in Halls of Torment has a secret.
As you’re fighting through the levels, you’re bound to find a book on some pedestal. The book usually has the name ‘_____ Pages’.
The book gives a small lore tidbit, but most importantly has a riddle on how to access the hall’s secret. The answer usually consists of fighting enemies at a particular location, but locating the hall’s secret can sometimes be a bit more complicated than that.
However, once you find the answer to the riddle you will be rewarded with a powerful item.
These items usually aid you in the boss fight in tremendous ways. Whether it’s dealing a massive amount of damage, or completely nullifying an attack, they can be worth seeking out if you are struggling.
Gameplay
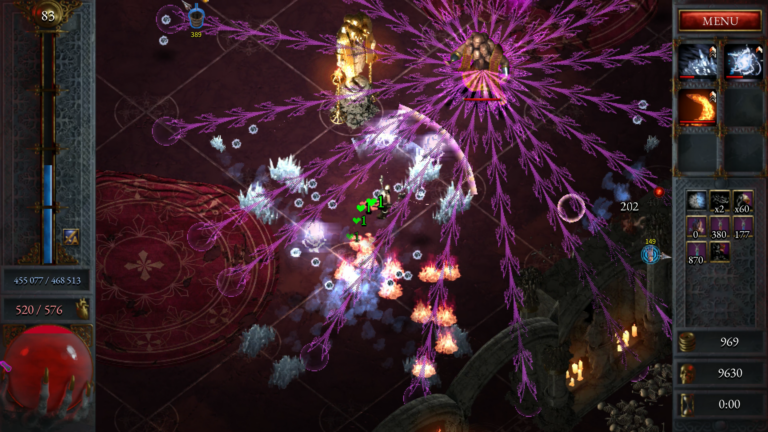
Now that we have all this information on the systems and mechanics of Halls of Torment, I want to take a second to explain how this all comes together. To do that, we have to go over the basic gameplay loop.
While at camp, you can adjust your shrine blessings, change up your character’s scriptorium bonuses, and select your equipment loadout. When you’re ready, head into a hall and start a run.
You have to survive 30 minutes in whichever hall you chose. You can see a timer counting down on the right side of your HUD. During the run you’ll fight waves of enemies, which drop exp gems. Pick up those gems to level up and increase your power for future waves.
You’ll also notice that there are a few points of interest highlighted on your screen. They usually point you to an ability scroll or exp gem magnet, and make good starting goals if you’re not sure where you want to go.
Every now and then, boss enemies will spawn as part of the wave. If you defeat them, they will drop equipment, extra bottles, or ability scrolls. You can equip the new items immediately, or you can store up to four to change up later. If you already have the Wellkeeper unlocked, you can send one piece of equipment back up to purchase later.
Keep this up for 30 minutes, and the boss Lord will spawn. Defeat him to clear the hall, and open up the portal back home. They will also drop a Torment Shard, so make sure you collect that. You’ll also get one final opportunity to send an item back up the well.
Once you are done, head through the portal and go back to camp. Back at camp, start the loop over again by setting up your character for the next run.
That’s the basic gameplay loop of Halls of Torment. Of course, this is just the barebones version of the loop. As you’ll see in a moment, there are ways to alter the loop to be much more challenging, with an opportunity for greater reward.
Progression
One of the best things about Halls of Torment, is that it always feels like you’re progressing in some way. Even completing random quests gives you an exp boost, so you can get more powerful during future runs.
But of course, there is a natural progression in the game. I want to go over how the basic progression in Halls of Torment works.
First and foremost, you will always have an active quest that shows up at the top of your screen. If you ever get stuck and don’t know what to do to progress, complete that quest. Most of the time that will unlock a new mechanic that introduces a power boost.
Outside of the active quest, you can also complete quests in the quest log however you wish. Completing them gets you the aforementioned exp boost, as well as new traits, characters, and gear unlocks.
Another form of progression comes from gear unlocks. Beat bosses, collect gear, send them up, and then purchase them. Sometimes having the right item build can push you to the next level.
After beating a hall, you also unlock Agony mode for that hall. Agony mode allows you to play the hall with select modifiers, completely changing the gameplay. The tradeoff for this is that the rewards are far greater.
Speaking Agony mode, let’s take a moment to further discuss what it is and what it offers to players.
Agony Mode
As you complete more and more runs, you’ll start to get a good feel for the game. You’ll find yourself cruising through the halls, with nothing to challenge your destructive powers.
And then you notice a new shrine next to the hall entry door, the Shrine of Agony. You think to yourself, “Eh sure, Agony can’t possibly be any worse”. Let me tell you know, Agony is for sure worse.
Agony mode allows you to replay the halls, but with some challenging differences. You can use Artifacts to add modifiers to the run. Adding modifiers will increase enemy health, defense, damage, and speed, but also increase the amount of XP you get.
At first, you will won’t have any Artifacts to add. But once you complete a hall in Agony mode, the hall Lord will drop an artifact for you to pick up. You have to beat each hall at least once before you can start collecting more.
Now you may ask, why even bother doing this? What’s the point? Well, playing on Agony mode offers a lot of bonuses you cannot get anywhere else in the game.
First off, you get a significant EXP boost, which will allow you go go up to and past level 100. If you beat certain challenges in Agony mode you get access to Hero Marks, which gives you a way to ‘multiclass’ your character. You can find new herbs that aren’t available in regular mode. Another plus is one of the Artifacts reduces run time from 30 minutes, to 20 minutes. And finally, perhaps the biggest reason to play Agony mode, is that you can collect uncommon equipment. These specialized items are more powerful versions of the standard equipment you find throughout the game.
Keep on collecting Artifacts to add modifiers to your run to really challenge yourself!
Builds
One of the most fun parts of games like this is theory crafting and planning out your builds. And in a game as massive as Halls of Torment, there are a ton of viable builds that you can choose from.
There’s no way I could fit all possible builds in this one little section. But if you do find yourself stuck, here are a couple of builds that may help you get going.
If You Ain't Crittin', You Ain't Hittin
Character: Shield Maiden
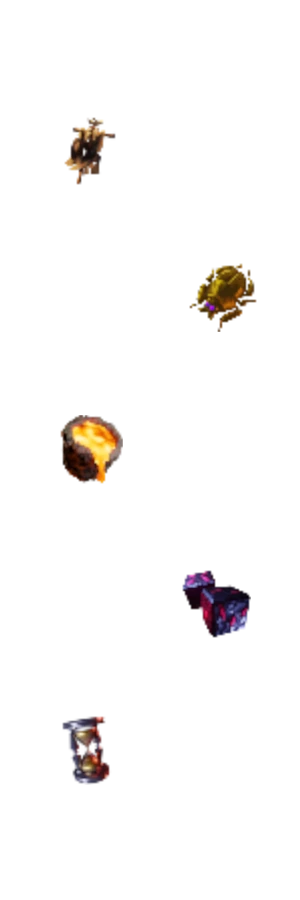
Equipment: Anything that boosts Block Strength/Defense. The Thornfist or Fencing Gauntlets work phenomenally.
Abilities: Ring Blades, Morning Star, Astronomer’s Orbs
Traits: Select anything that boosts Block Strength, Defense, and Health.
Why This Works: One thing you will learn quickly, is that the Shield Maiden is one of the most broken characters in the game. The reason is because if you build her for defensive stats, she becomes a walking steel wall. She gets extra Block Strength per level up, and eventually only the strongest hits will get through. She can also deal a good amount of damage due to her high Crit Bonus. The first few levels are really tough, but after about level 15 you’ll be practically unkillable.
Crit City
Character: Archer
Equipment: Anything that boost Crit Chance and Crit Bonus.
Abilities: Phantom Needles, Ring Blades, Morning Star
Traits: Prioritize Crit Chance and Crit Bonus over everything else. Add in Force and Multistrike wherever you can.
Why This Works: A second thing you’ll learn quickly is that the Archer can absolutely shred enemies with Crit Chance and Crit Bonus. He has a high base Crit Chance and also gains more damage per level, so he can really pump out the DPS. If you add in more Force, Piercing, and Multistrike, you can thin out enemies waves in no time.
Watching the World Burn
Character: Exterminator
Equipment: Anything that adds extra Burn Damage or Burn Chance. Ruby Circlet is great here. If you pick up Physical Damage abilities, then Sparking Tips gloves are fantastic.
Abilities: The Fire Abilities (Dragon’s Breath, Flame Strike).
Traits: Force is the best stat for the Exterminator by a mile. Afterwards, increase Damage, Area, and Burn Chance.
Why This Works: The Exterminator does one thing very well, and that is light enemies on fire. If you increase Force, you improve his damage, and flame piercing. You want to keep spreading the burn debuff on as many enemies as possible. If you have the Sparking Tips, make sure you pick up a Physical Damage ability in order to proc them for massive damage.
Farming
Equipment is one of the largest power increases in Halls of Torment. And since equipment and loadouts matter so much in this game, farming items becomes a huge priority.
Luckily, farming in Halls of Torment is simple, especially if you’ve gotten a good build going and have no trouble clearing Agony modes.
In order to farm equipment, you want to make sure you’re in Agony mode. The reason is because in Agony mode, you have a chance to use the well more than once. Sometimes bosses will drop well buckets instead of gear and scrolls. With those buckets, you can send up an additional item.
Plus, in Agony mode, enemies drop rare versions of equipment. At first, you won’t be able to send them back to your stash. However, if you beat the secret level, you get the Archeologist’s Thread artifact. This artifact allows you to send up the rare gear that you find.
It’s an important artifact, so make sure you get it. However, the secret level is tough, so make sure you’re prepared.
Games Similar to Halls of Torment
- Vampire Survivors – The codifier of the Survivors style genre. This game still holds up and has received constant updates as of this writing.
- Death Must Die – This game draws comparisons to Halls of Torment more than any other. This game is a fun blend of Hades, Vampire Survivors, and Diablo. It’s still in early access, so keep that in mind while purchasing. If you’re looking for a guide to get you started, you can check out my Death Must Die 101 Guide.
- Brotato – A fun game that looks like it came straight out of Newgrounds and the flash game era. It’s been on my list for a while, and I may have to dive in.
- Dome Keeper – Another game that’s been on my list. This keeps getting recommended to me, and looks like an insane amount of fun.
Credits
I hope you found this guide useful, and feel like you have a better understanding of Halls of Torment and its mechanics. There was a TON of information presented here, but even still there is more to discover. Keep playing and experience all this game has to offer!
If you have any questions, or just notice anything wrong or missing in the guide, please feel free to reach out to me. You can contact me at celxius@celxiusgaming.com.
A lot of work and research went into making this guide, and it would not be possible without the resources below. If you want more information or need more clarification, be sure to check them out.
- Halls of Torment Wiki
- Halls of Torment Subreddit
- YouTube community videos
- This incredible achievement guide that’s posted on Steam. It’s seriously fantastic and offers incredible information for finishing every achievement in the game.